Dairy-Free Vanilla Ice Cream is a delicious and simple, no-churn recipe for a homemade soft frozen dessert with only 4 ingredients.
Dairy-Free Vanilla Ice Cream is a no-cook, no-churn soft frozen dessert that is simple to make. Just mix and freeze. And have it at the ready for a refreshing and delicious dessert anytime.
Want to try other dairy-free flavors of ice cream?
And check out the history of ice cream!
General information regarding cooking:
The following information may not particularly pertain to this recipe but rather answers general useful questions related to cooking.
What are the different oils used in cooking?
“High-heat” oils have neutral flavors and have been processed in order to handle high temperatures and are good for sautéing, searing, and frying. These include canola oil, vegetable oil, avocado oil, and grapeseed oil, each with its own “best for” with chefs.
Some oils have their own flavor and are good for sautéing and roasting and add a little extra to the dish. These include extra virgin olive oil, coconut oil, and peanut oil. Extra virgin olive oil works well with roasting or sautéing, but not for deep frying.
Coconut oil is good in dishes where a slightly coconut flavor enhances the dish, and peanut oil is good for deep frying and will add a subtle nutty taste and smell. Many Asian dishes call for peanut oil in the ingredients.
Then there are oils that are not used with heat but rather for dressing up foods, such as sesame oil, flaxseed oil, and walnut oil, among others.
What does it mean when recipes say “to taste” about an ingredient?
When recipes say “to taste,” it means that you can put in as little or as much as you like to your own taste. Some recipes have many ingredients that a cook can adjust to their own taste when cooking (not so much when baking though).
The best way to calculate what your taste is with a recipe that you are not yet familiar with is to first taste the dish and then add the “to taste” ingredient GRADUALLY, a little at a time—a splash of this or a pinch of that—until the dish is just the way you like it. Make sure to stir the ingredient after each time you add it so that the flavor will distribute evenly and become part of the dish. Then taste again. Repeat until you reach your personal preference.
Note: If you plan on using the recipe again, it is highly recommended to make a note of what and how much you added so that you can refer to it next time.
What does it mean when a recipe says that an ingredient is “optional”?
If an ingredient is “optional,” it means that you can add it in or not based on your own preference. An optional ingredient can be flavor related (i.e., salty, sweet, spicy, etc.), appearance related (garnish), or even something like nuts or chocolate chips in baking.
What does “savory” mean?
“Savory” refers to foods that are not sweet, such as foods that taste salty, spicy, or herbal.
What cooking measurement expressions mean:
Drop – ¹/₆₄ teaspoon (or less—it’s however a literal drop comes out)
Smidgen – ¹/₃₂ teaspoon
Pinch – ¹⁄₁₆ teaspoon (what you can grab between your finger and thumb)
Dash – ⅛ teaspoon (what comes out when you shake out of a shaker or bottle)
Tad – ¼ teaspoon
Dollop—a glob on a spoon (like with mayonnaise or ice cream)
Scant—a scant cup is almost a cup, just below the line.
Heaping—above the line of the spoon (teaspoon, tablespoon)*
Some useful cooking terms:
Sauté: Cooking quickly in a small amount of oil or fat in a frying pan on a relatively high heat that causes a slight browning of the food on the outside.
Sear: Browning the outside of meat at a high temperature.
Sweat: Cooking vegetables (often onions) in a little oil or fat on a low heat until they become soft and translucent (no browning).
Simmer: Heating liquid to just below the boiling point (has slow bubbles).
Boil: Cooking food submerged in water hot enough to have rapid, rolling bubbles.
Poach: Cooking in a liquid, or partially submerged, on low heat.
Roast: Cooking with consistent dry heat in an enclosed space, over 400 degrees Fahrenheit.
Bake: Cooking with dry heat in an enclosed space, under 400 degrees Fahrenheit.
Broil: Cooking with intense heat from above.
Grill: Cooking with heat from below, typically over a flame or coals.
Braise: Cooking already-seared meat in a small amount of liquid in a covered pot.
Blanch: Quickly submerging food into boiling water and then immediately into ice water to stop the cooking.
Steam: Cooking with vapor from hot simmering water from below.
Shred: Creating long, thin strips (not necessarily uniform) of vegetables, like in coleslaw.
Grate: Scraping food against a surface with rough, tiny holes that break it down into very small, fine pieces.
Zest: The scrapings of the colorful outer skin of a citrus fruit.
Mince: Cutting into the smallest pieces possible.
Dice: Cutting into small cubes.
Chop: Cutting into small (bite-size) pieces.
Julienne: Cutting into long, thin strips (like matchsticks).
Glaze: a thin liquid with high-sugar or high-fat coating applied to food or baked goods that gives a shiny look and adds flavor.
Fold in: To gently combine a light ingredient into a heavier one.
Al dente: Cooking rice or pasta to the point before it gets soft (is slightly firm).
Emulsify: Forcing two liquids together that don’t normally combine (like oil and vinegar) into a smooth sauce or dressing.
Deglaze: Adding a liquid to a hot pan after searing meat to loosen the browned bits (called fond) that got stuck.
Slurry: A mixture of liquid and dry starch, such as cornstarch or potato starch, into a paste that is used to thicken sauces and soups. One can use flour to make a slurry as well.
Roux: (pronounced “roo”) is a cooked mixture of fat and flour.
Baking and Dessert Pantry Essentials
I never know when someone in my family is going to want a dessert at home, to bring to a friend’s house, or need for an event, so I like to make sure I can bake anything with very short notice. To that end, I keep a variety of supplies and ingredients in the house that will allow me to do just that.
I can’t tell you how many times I was glad to have whatever I needed within reach for the last-minute visitor or for when one of my kids went to a friend or had a school event without much prior notice.
I have slowly collected things over the years as I needed them (or if I found a good sale) and like to keep more than one of the smaller items in case I don’t want to wash dishes in the middle of baking.
My basic “equipment” includes:
- a stand mixer, which I use mostly for dough and sometimes for whipping
- a hand mixer (for things that aren’t dough and I don’t want to mix manually)
- a kitchen scale
- different sizes and shapes of baking pans, including loaf pans
- mixing bowls (or just large bowls—I have plastic, glass, and metal)
- cookie sheets
- pie dishes
- dry measuring cups
- liquid measuring cups
- measuring spoons
- whisks
- rubber spatulas (really good for when you don’t want to leave anything in the bowl)
- rolling pins
- a baking mat for rolling out dough
- baking strips
- a good supply of baking (or parchment) paper (also round for layer cakes)
I can certainly get by without a lot of the above, but it makes baking so much simpler when I just have whatever I need at my fingertips.
Note: The measuring cups and spoons should match as far as the measurements are concerned. Not all cups are properly marked, and this can throw your measurements off.
In addition to the equipment, there are the baking ingredients that I try to keep in the house at all times:
- flour
- white granulated sugar
- brown sugar (light/dark—I usually keep dark)
- confectioners’ sugar (powdered sugar)
- salt
- baking powder
- baking soda
- cocoa powder
- ground cinnamon
- ground nutmeg
- ground ginger
- ground cloves
- baking chocolate
- chocolate chips
- instant dry yeast
- vanilla and/or vanilla sugar
- cooking oil/cooking spray
- margarine or butter
- eggs
- honey
- instant coffee
- various extracts (real or imitation)
I also make sure that I have the following on hand to be able to make a variety of fillings, frostings, and toppings:
- whipping cream
- powdered pudding mix
- powdered sugar
- a good chocolate spread
Then, there is the following to make last-minute quick desserts:
- packaged pie dough or ready-made pie crusts
- puff pastry dough
Lastly, it’s not a bad idea to keep fun toppings, such as chopped walnuts, raisins, and the oh-so-important container of sprinkles.
A little about ice cream
This recipe clearly isn’t “real” ice cream but more of a frozen dessert.
Real ice cream is made by an involved process using milk, milk protein, sugar, ice, water, and air, which turns the mixture into foam as frozen air cells.
Nowadays, we have freezers in which to store our ice cream (and frozen desserts), but before refrigeration, making ice cream took quite a bit of effort and was only served for special events or on special occasions.
Before refrigeration, ice had to be cut from frozen lakes and ponds in the winter. The ice was then stored for later use (even in the summer) in ice houses or even in holes dug in the ground.
The pot-freezer method of preparing ice cream was by making it in a large bowl, which was placed in a tub filled with crushed ice and salt to reduce the temperature of the ingredients to below the freezing point of water.
French confectioners used a method similar to the pot-freezer method but used a covered pail with a handle attached to the lid (called a sorbetiere).
The hand-cranked churn replaced the pot-freezer method and also used ice and salt for cooling. This method was quicker than the pot-freezer method and produced a smoother ice cream.
Ice cream was initially sold by small businesses until a milkman, Jacob Fussell, began making small batches of it from leftover milk and cream. Fussell opened the first ice cream factory in 1851 in Pennsylvania and moved his successful business to Baltimore in 1854.
Fussell, known today as the Father of the Ice Cream Industry, opened more factories in other cities and taught the business to others who opened their own factories. The mass production of ice cream made it more affordable and more accessible to everyone and was no longer a dessert just for the rich.
Popularity increased even more with the invention of the household freezer in the 1920s, when it became much easier to store the frozen dessert.
Ice cream is a beloved dessert, and some people will go to some extreme lengths to get their hands on the treat. For example, during World War II, American fighter pilots in the South Pacific found an ingenious way of making ice cream.
They attached 5-gallon cans to their aircraft. The cans were fitted with small propellers spun by the slipstream, which drove a stirrer, which agitated the mixture, which froze in the high altitude of the planes as they flew. B-17 crews and others found similar methods of making ice cream during the war.
Today, getting ice cream is simple and inexpensive, and the flavors are numerous. Many households have their own ice cream machines for at-home preparation.
Dairy Free Vanilla Ice Cream is more of a frozen dessert than “real” ice cream, but it is easy to make and delicious. So enjoy!
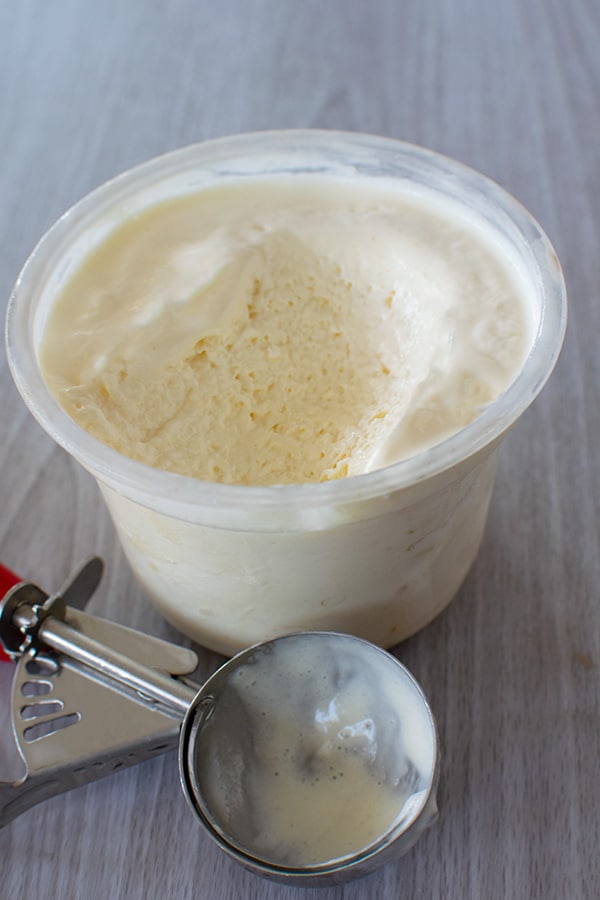
Dairy-Free Vanilla Ice Cream
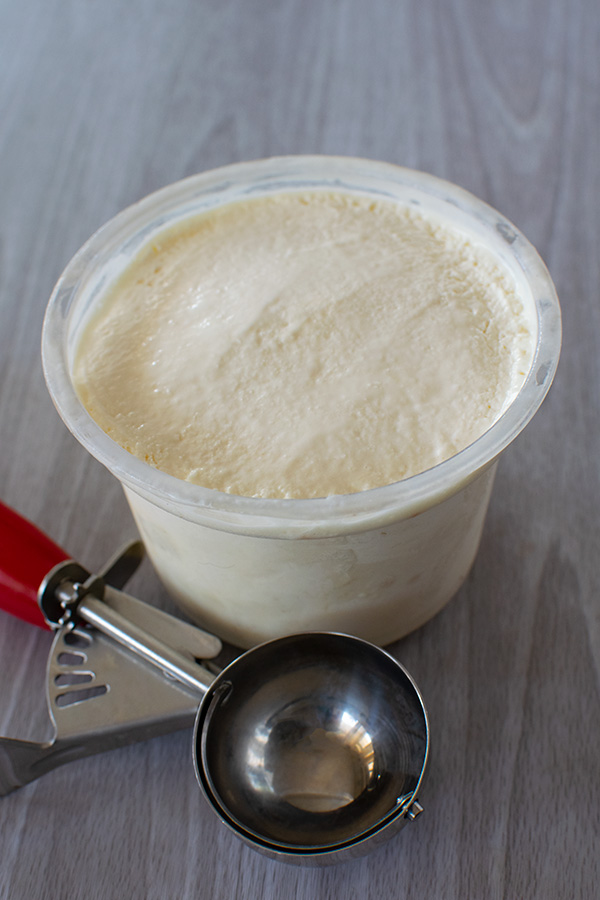
Homemade, no-cook, no-churn soft vanilla ice cream, without milk.
Ingredients
- 1 8-ounce container of dairy-free whipping cream
- 3 eggs
- 1/2 c sugar
- 1 tablespoon vanilla flavoring or to taste
Instructions
- Whip whipping cream until stiff.
- Add eggs, sugar, and vanilla into the whipped cream.
- Whip together well.
- Freeze for 8 hours or until stiff *
Notes
* This is a soft ice cream so it won't get hard and the freezing time depends on your freezer.
Nutrition Information:
Yield:
4Serving Size:
1Amount Per Serving: Calories: 363Total Fat: 25gSaturated Fat: 15gTrans Fat: 1gUnsaturated Fat: 8gCholesterol: 207mgSodium: 70mgCarbohydrates: 27gFiber: 0gSugar: 27gProtein: 6g