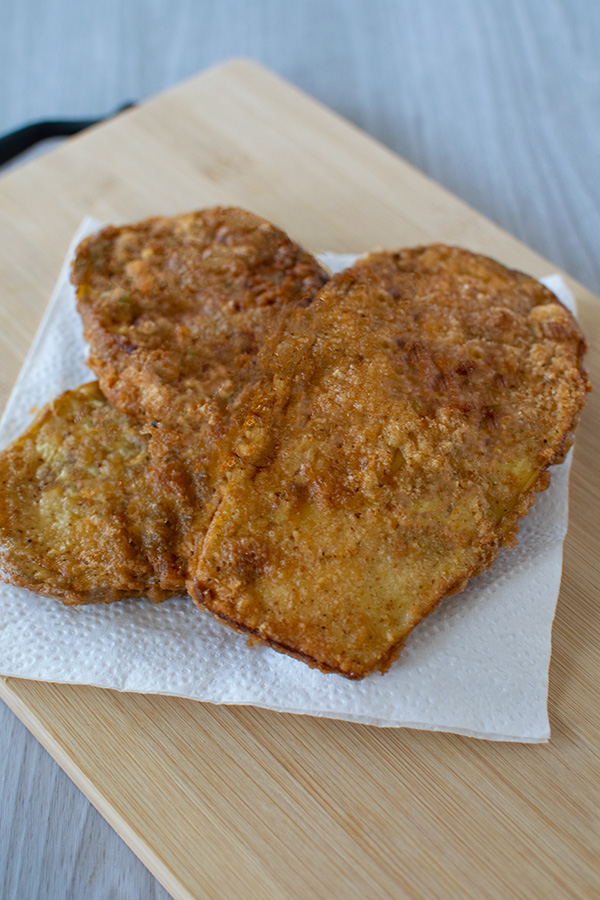
Easy fried breaded eggplant cutlets are a simple dairy-free recipe that requires only eggplant, egg, and breadcrumbs, plus cooking oil to fry them to a crispy golden brown.
Whether you are staying away from dairy or just looking for something crispy, these slices deliver a delicious crunch!
They are delicious plain, or you can use your favorite spices as seasonings to flavor them to your own taste!
Have them as is right out of the pan. Or top them with dressing or sauce!
They also make the perfect base for eggplant parm!
About the dish
Fried eggplant can be made plain or seasoned. Use seasoned bread crumbs or choose your own!
Eat them on a plate or have them in pita or on a roll!
Make ahead and warm up later!
Or use them to make a delicious and cozy vegetarian eggplant parm!
So many options for this simple recipe!
Also, you can slice the raw eggplant through the length (like in the photo), or you can slice them through the width (into disks).
Tips:
1) This recipe calls to dip in egg twice—once before the breadcrumbs and once after. If you choose to only dip once before the breadcrumbs, you can use fewer eggs, so start with less and add if you need to.
2) If you want a different kind of flavor, try using matzo meal or matzo cake meal. Not only will you get extra crunch, your fried eggplants will be kosher for Passover when the time comes!
Some info about cooking:
What are the different oils used in cooking?
“High-heat” oils have neutral flavors and have been processed in order to handle high temperatures and are good for sautéing, searing, and frying. These include canola oil, vegetable oil, avocado oil, and grapeseed oil, each with its own “best for” with chefs.
Some oils have their own flavor and are good for sautéing and roasting and add a little extra to the dish. These include extra virgin olive oil, coconut oil, and peanut oil. Extra virgin olive oil works well with roasting or sautéing, but not for deep frying.
Coconut oil is good in dishes where a slightly coconut flavor enhances the dish, and peanut oil is good for deep frying and will add a subtle nutty taste and smell. Many Asian dishes call for peanut oil in the ingredients.
Then there are oils that are not used with heat but rather for dressing up foods, such as sesame oil, flaxseed oil, and walnut oil, among others.
What does it mean when recipes say “to taste” about an ingredient?
When recipes say “to taste,” it means that you can put in as little or as much as you like to your own taste. Some recipes have many ingredients that a cook can adjust to their own taste when cooking (not so much when baking though).
The best way to calculate what your taste is with a recipe that you are not yet familiar with is to first taste the dish and then add the “to taste” ingredient GRADUALLY, a little at a time—a splash of this or a pinch of that—until the dish is just the way you like it.
Make sure to stir the ingredient after each time you add it so that the flavor will distribute evenly and become part of the dish. Then taste again. Repeat until you reach your personal preference.
Note: If you plan on using the recipe again, it is highly recommended to make a note of what and how much you added so that you can refer to it next time.
What does it mean when a recipe says that an ingredient is “optional”?
If an ingredient is “optional,” it means that you can add it in or not based on your own preference. An optional ingredient can be flavor-related (i.e., salty, sweet, spicy, etc.), appearance-related (garnish), or even something like nuts or chocolate chips in baking.
What does “savory” mean?
“Savory” refers to foods that are not sweet, such as foods that taste salty, spicy, or herbal.
A little about eggplants
The eggplant is native to India and Asia, where it can be found growing wild, and it is believed that eggplants were brought to Europe sometime during the 7th or 8th century.
Australians and Americans call the vegetable eggplant, while in England it is called an aubergine, from the French word for this vegetable.
Because of its meaty texture, eggplant is used instead of meat in some vegetarian versions of meat recipes.
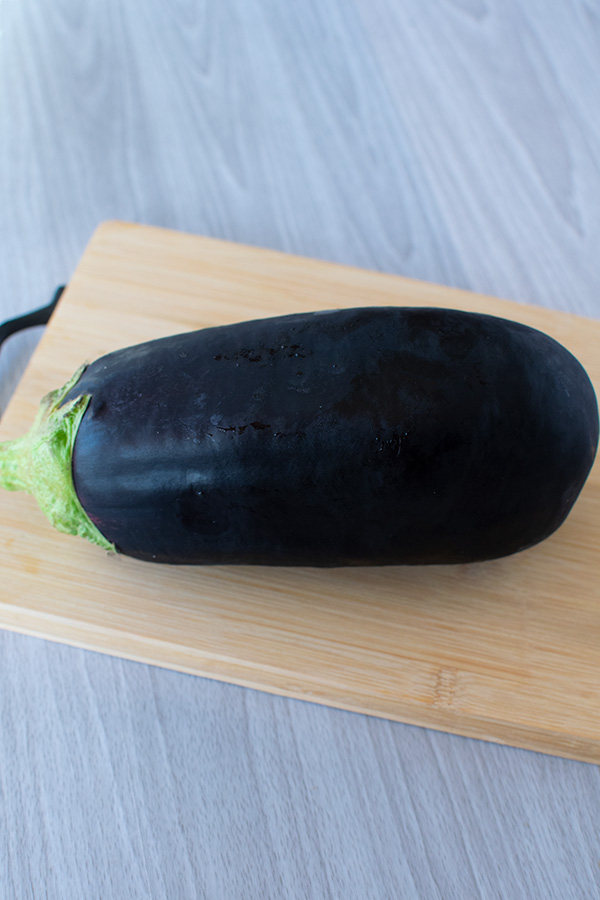
While there are a variety of types of eggplants, the one for this recipe is the large, egg-shaped (or teardrop-shaped), blackish-purple one with the meaty inside.
Eggplants have health benefits, as they contain antioxidants like vitamins A and C, which help protect your cells against damage, and are low in calories.
About cooking eggplant
Eggplants can be roasted, baked, steamed, deep-fried, or sautéed.
Before cooking an eggplant, cut off the top part where the green is (called a calyx). The bottom tip should also be removed, but this is not imperative. The skin is perfectly fine to eat, but it must be cooked well. Otherwise it may come out chewy.
This recipe can use either peeled eggplants or eggplants with the skin (having the skin on will not ruin the recipe).
Eggplant is naturally a little bitter. If you find that to be the case, you can draw out the bitterness by sprinkling it with salt and letting it sit awhile. If you are using slices or pieces, slightly salt after cutting. I have personally never found this to be a problem when cooking with eggplants
Using salt before cooking can help prevent the eggplant from absorbing too much oil and becoming greasy if using oil with the eggplant recipe (I normally just pat the pieces with a paper towel if need be).
If you do use salt, MAKE SURE to rinse it off before cooking the eggplant, or the salt will become a part of your dish!
Personally, I have never salted my eggplants before using them (and I have used eggplants in two countries) and have never had any problem with bitterness, but if you have any concern, please do.
If a recipe calls for frying, but you prefer not to do so because of the calories the oil will add to the recipe, you can spray with cooking oil and bake instead.
A little about eggs

For many years eggs were considered a source of high cholesterol and a possible cause of heart disease, and people were warned against them and recommended to have only a few per week in their diets.
It is true that one large egg yolk has 200 mg of cholesterol. However, the additional nutrients that eggs contain may actually help LOWER the risk of heart disease by raising the “good” cholesterol in one’s body.
Eggs are high in protein and filling but low in calories. They have nutritional value and contain a large variety of vitamins as well as some antioxidants.
The color of the yolk depends on the diet of the hen, and different types of chickens may lay different colored eggs; white or brownish.
Egg white consists primarily of approximately 90 percent water and contains almost no fat or carbohydrates.
The yolk of a new egg is firm, but then it absorbs water from the egg white, which causes it to increase in size and become loose.
You may be surprised to know that raw egg white is sometimes used in the preparation of vaccines.
Many people believe that since eggs are found in the refrigerated section of the supermarket, and very frequently near the dairy section, they are also dairy.
Nonetheless, eggs are NOT DAIRY. You CANNOT milk a chicken!
What is needed to make Easy Fried Breaded Eggplant Cutlets?
I hardly ever meal plan, so I like to keep a cupboard full of seasonings, spices, veggies, and canned goods in my kitchen to use whenever the mood strikes.
But these are all you need to have on hand to make this recipe even last minute!
eggplant
egg
bread crumbs, plain or seasoned
(oil for frying)
Easy 3-Ingredient Fried Breaded Eggplant Cutlets

Delicious and dairy-free recipe for breaded eggplant fried to a delicious and crispy golden brown.
Ingredients
- 2 large eggplants
- 6-8 eggs (start with 6, add more if needed)
- 2-3 cups breadcrumbs, plain or seasoned (start with 2 cups, add more if needed)*
- oil for frying
Instructions
- Heat oil in a large frying pan on medium heat (approximately 1/4" - 1/3" high).
- Cut off the ends of the eggplant.
- Peel the eggplants (or leave the skin on, if so desired—I leave the skin).
- Slice eggplant into slices of approximately 1/2" wide, either lengthwise or into disks.
- Pour eggs and breadcrumbs into separate bowls large enough to accommodate dipping the eggplant slices.
- Dip each slice into egg, then breadcrumbs, then egg again, making sure the slices are well coated.**
- Place in pan and fry one side until golden brown.
- Flip and fry on the other side until golden brown (you should be able to easily stick a fork through when they are ready).
- Remove and place on a plate covered with paper towels to drain.
Notes
*Using seasoned breadcrumbs will provide more flavor. If you use plain breadcrumbs, you might want to add your own seasonings. I don't add anything, and they fly off the plate, warm and crispy.
**Many people only use one coat of egg and do not redip after the breadcrumbs. If you don't dip a second time, you will need fewer eggs.
Additional note: The amount of eggs and breadcrumbs you will need depends on how many slices you have and how well you coat. That is why I write a range of amounts for both. Chances are you will be left with some extra, but having a nice amount allows for easier coating and starting with a smaller amount, and having more at the ready to add if needed helps prevent waste.
Nutrition Information:
Yield:
4Serving Size:
1Amount Per Serving: Calories: 523Total Fat: 9gSaturated Fat: 2gTrans Fat: 0gUnsaturated Fat: 5gCholesterol: 186mgSodium: 521mgCarbohydrates: 94gFiber: 11gSugar: 13gProtein: 20g