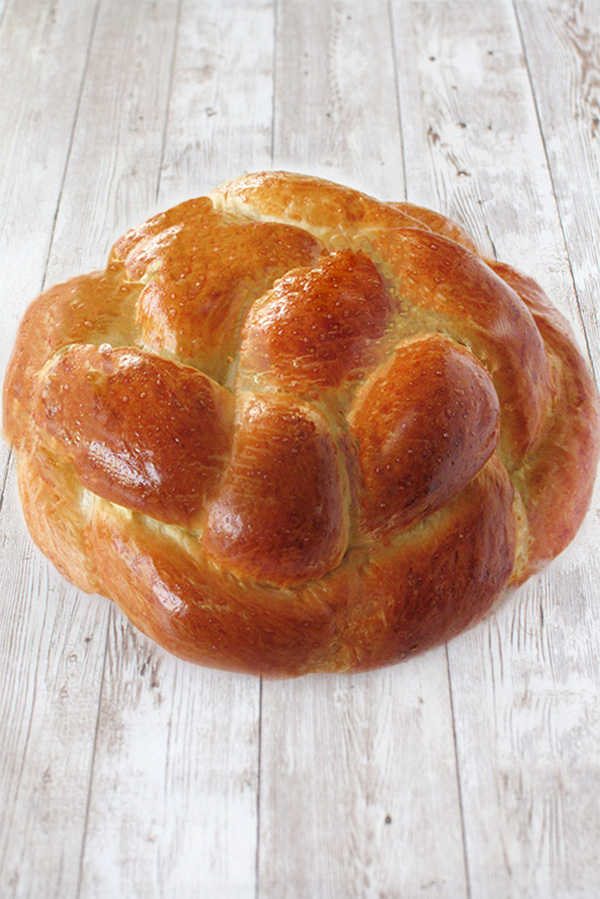
Fluffy Challah Bread is a 6-ingredient, dairy-free recipe for delicious and fluffy Jewish challah bread made with eggs.
This Jewish sabbath bread recipe is SO EASY that the hardest part is waiting for the dough to rise!
And it’s a terrific recipe for anyone wanting a soft dairy-free loaf of bread or rolls!
Challah, a braided bread, is eaten primarily on Shabbat and on Jewish holidays. Two challahs should be present at each traditional meal during these days.
There is an entire history connected to challahs and why and how we have them at our meals on shabbat and holidays.
I tried many challah recipes. Some came out good, some not. Every week, my family had no idea what to expect. It wasn’t the recipe, it was me. I just couldn’t get the hang of making great challahs week after week.
With this challah recipe, I have yet to mess them up even once after all these years.
It may look like a complicated recipe because of the steps, but it is actually very simple to make. The longest step of the whole process is waiting for the dough to rise!
…. and the outcome is SO fluffy and SO good that you may never want to bother to buy challah from the store again!!
And although the recipe calls for eggs, the bread doesn’t come out yellow like the one sold in the Jewish bakery’s.
For this, a little yellow food coloring needs to be added to the dough (or turmeric—if you want to go natural—but find out how to do this beforehand because if you add too much it can cause a soapy flavor).
plus water, egg wash (optional), and sesame topping (optional)
Are challahs traditionally dairy or non-dairy?
Challahs are traditionally non-dairy. This is because they are for Jewish occasions, which mostly include meat meals, and Torah-observant Jews do not eat meals that combine meat with milk.
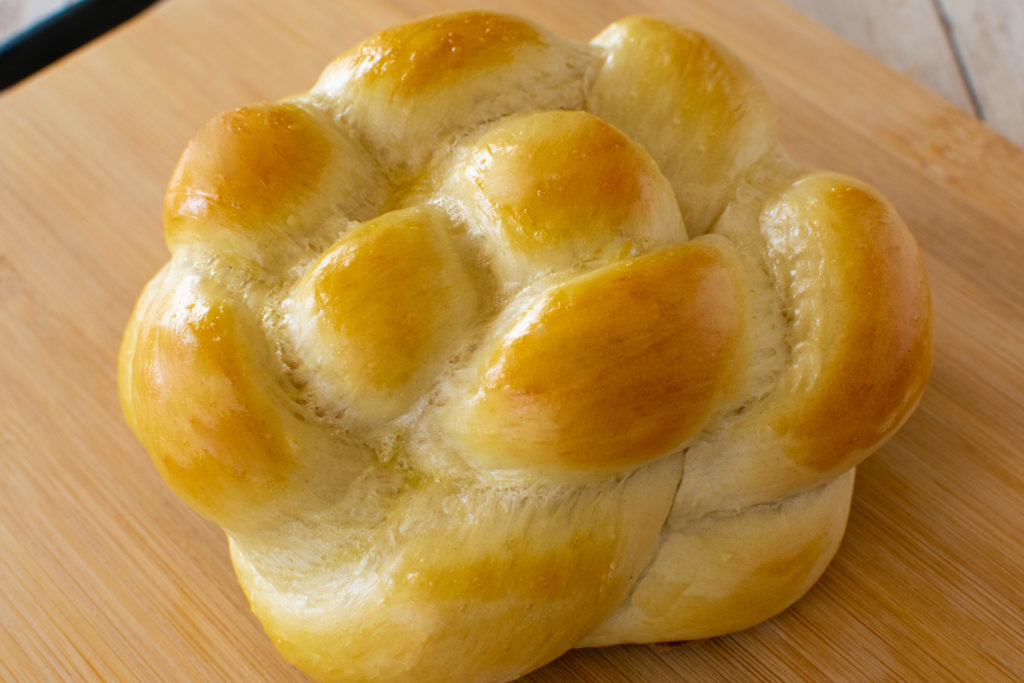
Braided challahs are mostly used on Shabbat or at an event like a wedding, bris, or bar mitzvah. However, round challahs are traditionally used for holidays. (There is no absolute rule to this).
Contrary to what some people believe, eggs are NOT dairy (you cannot milk a chicken).
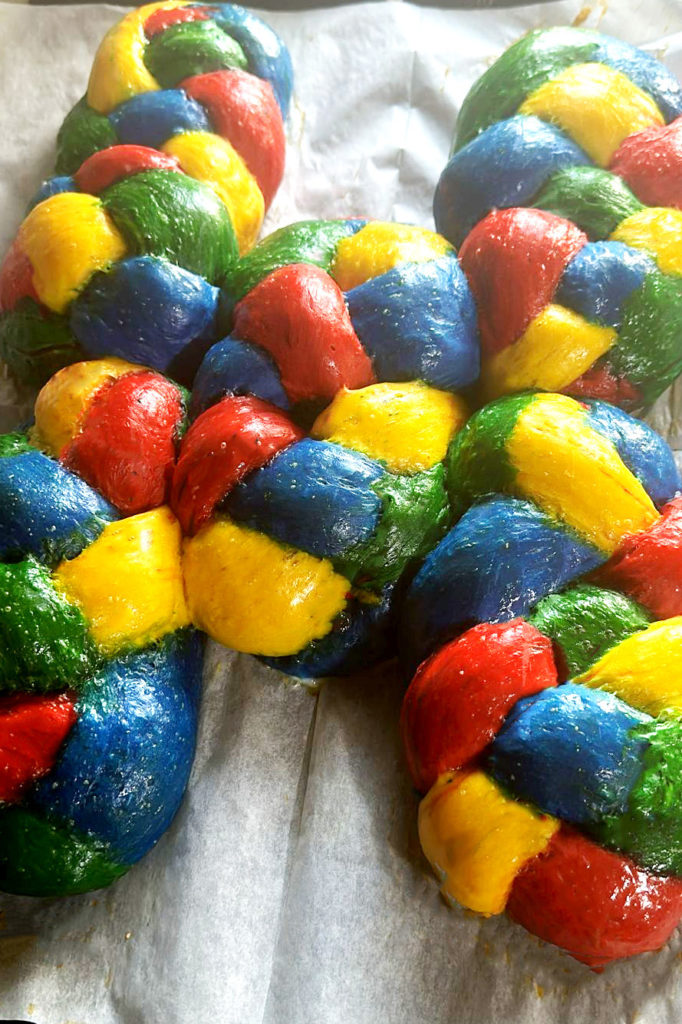
These were made for Parshat Noah to represent the rainbow
(I know, I overdid the colors).
Why do recipes with yeast say to make a mixture of the yeast, warm water, and sugar and set aside until it bubbles?
Most dough recipes that include yeast will give instructions to mix the yeast with warm water and sugar and set aside until it bubbles before using it. This is NOT part of the recipe but rather a short process called “proofing” to ensure that your yeast is alive because if it is not, your dough will not rise.
In order to proof your yeast, you need to let the yeast, warm water, and sugar mixture sit for 5-10 minutes to see if it develops foamy bubbles. If it does, your yeast is alive. Otherwise, it should not be used.
The water for proofing must be warm in order to activate the yeast because if it is too cold, nothing will happen, and if it is too hot, it will kill the yeast. Warm is between 105 and 110 degrees Fahrenheit (or 40 and 43 degrees Celsius). I usually just put my finger in the water, and if it is comfortably warm, I use it.
The sugar is used in proofing because yeast eats the sugar and releases gas (carbon dioxide), which is what causes the bubbles. If there are no bubbles, either the water was too hot or too cold, or the yeast is simply dead.
Note: If you are CERTAIN that your yeast is alive, then this process is unnecessary.
Easy Fluffy Challah Bread Without Eggs does not call to proof the yeast. Why not?
Proofing (or blooming) the yeast is only to be certain that the yeast is still active and your challah will rise. Proofing is when you take your yeast, a little warm water, and a little sugar and mix them together.
If you are concerned that your yeast may no longer be active, then certainly proof it before using.
If your yeast is active, it will normally bubble within 5 – 10 minutes. If you don’t see it in that amount of time, I would wait longer just in case before you throw it out (especially if you buy large bags like I do).
If you proof your yeast for this recipe, you should use water and sugar from the quantities that the recipe already calls for.
For fluffier challah, should I let the braided dough rise more than double?
This is an absolute, hard NO. It’s not so important for your dough to have risen exactly double – it’s just an approximation. However, as I mentioned in the background section above, if it rises too much, it can fall when baking. Over-rising can also cause the dough to be bitter and taste like beer from the over-fermenting of the yeast.
Can I freeze?
Absolutely YES. Just make sure to wrap or bag well in an air-proof bag or container because otherwise it can become freezer-burnt.
Don’t be afraid of the instructions!
While the list of instructions is long and the start-to-finish time is long, the bottom line is that Easy Fluffy Challah Bread takes minimal effort.
All you do is mix the ingredients, let sit to rise, form the challahs, let rise again, and bake. That’s it!
Love baking?
I like to make sure that my kitchen contains a variety of essentials that will allow me to bake a variety of goods at any time.
So, besides the usual equipment, these are always in my cupboard!
- flour
- white granulated sugar
- brown sugar (light/dark—I usually keep dark)
- confectioners’ sugar (powdered sugar)
- salt
- baking powder
- baking soda
- cocoa powder
- ground cinnamon
- ground nutmeg
- ground ginger
- ground cloves
- baking chocolate
- chocolate chips
- instant dry yeast
- vanilla and/or vanilla sugar
- cooking oil/cooking spray
- margarine or butter
- eggs
- honey
- instant coffee
- various extracts (real or imitation)
What is needed for this recipe?
I hardly ever meal plan, so I like to keep a cupboard full of seasonings, spices, veggies, and canned goods in my kitchen to use whenever the mood strikes.
But these are all you need to have on hand to make this recipe!
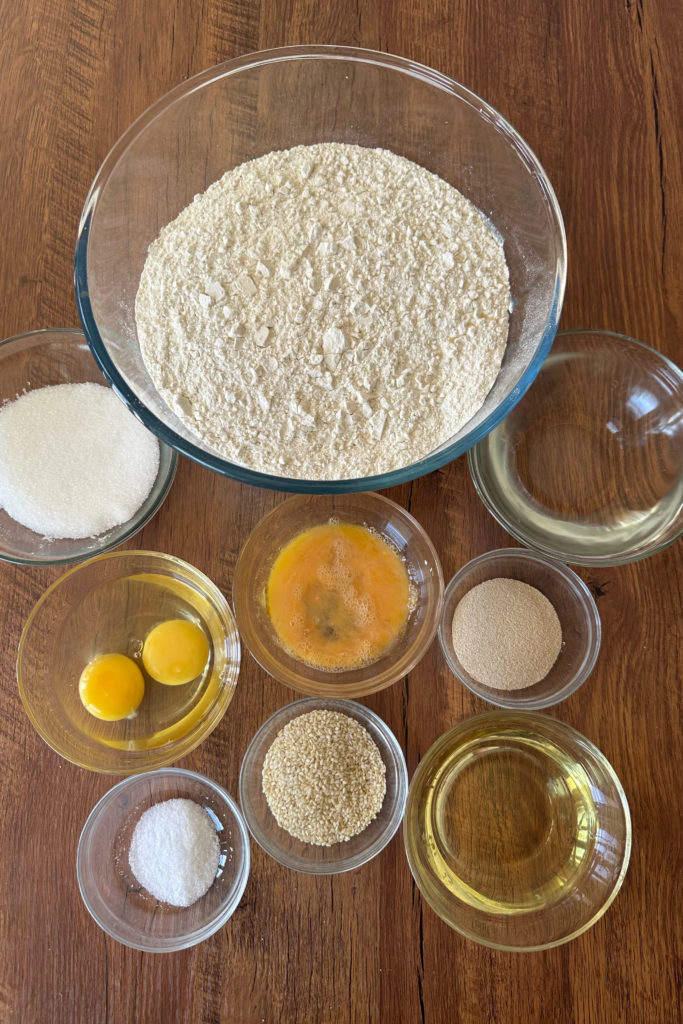
flour
oil
eggs
white granulated sugar
instant dry yeast
salt
sesame seeds, poppy seeds, etc for topping, if desired
Prefer challah bread without eggs? Try this easy Easy Water Challah Bread recipe!
Easy Fluffy Challah Bread (Traditional Jewish)
Easy and delicious fluffy challah bread.
Ingredients
- 8 cups (1 kg) flour
- 3 eggs (two for the challah and one to coat)
- 1/2 cup oil
- 1/2 cup white granulated sugar *see notes
- 3 tablespoons instant dry yeast **see notes
- 1 tablespoon salt
- 1 1/2 - 2 cups warm water
- sesame seeds, poppy seeds, etc for topping, if desired
Instructions
Dough
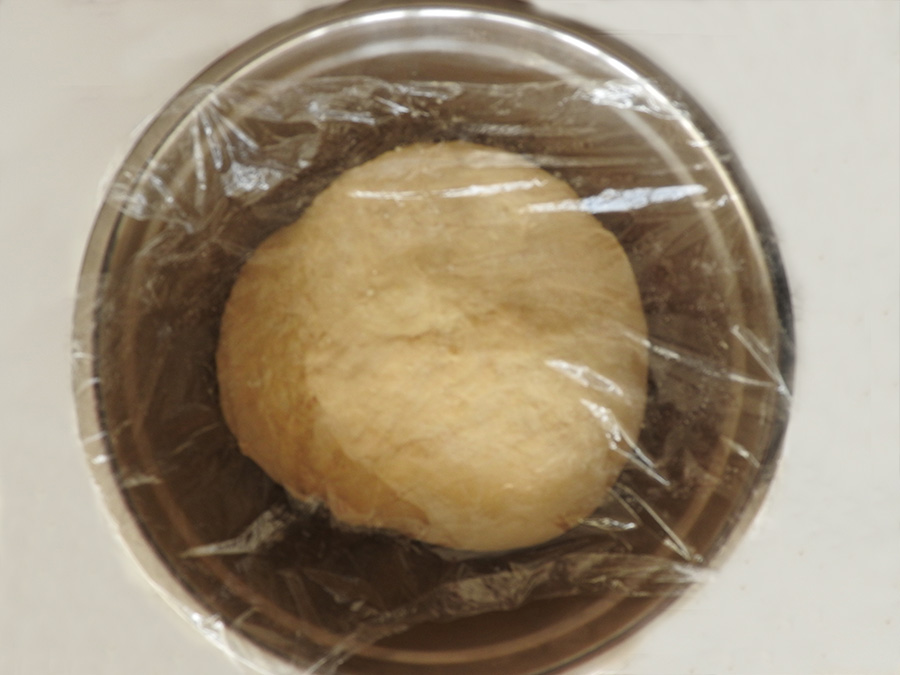
- Pour flour into large bowl (I sift first).
- Add oil, sugar, salt, two eggs, and yeast. **see notes
- Mix with mixer or knead by hand, adding water a little at a time until the dough has become like a slightly sticky Play-doh and then mix for a few more minutes.
- Cover bowl with plastic wrap (you can use a damp cloth towel, however if the dough rises to that point, it will stick to the towel).
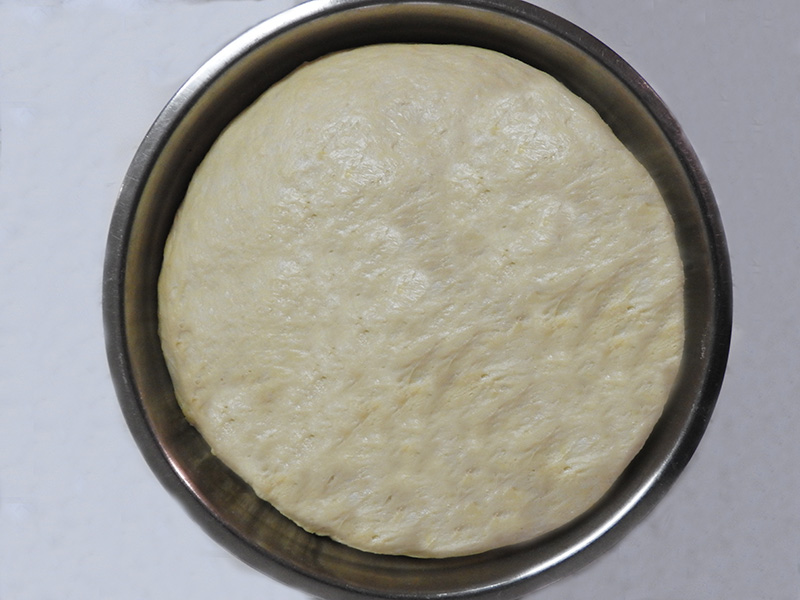
- Let rise until the dough approximately doubles in size (it doesn't have to be exact).
- Remove dough from bowl and place on a lightly floured surface (the stickier your dough, the more flour you will need, because you want to be able to work with it without it sticking to your work surface).
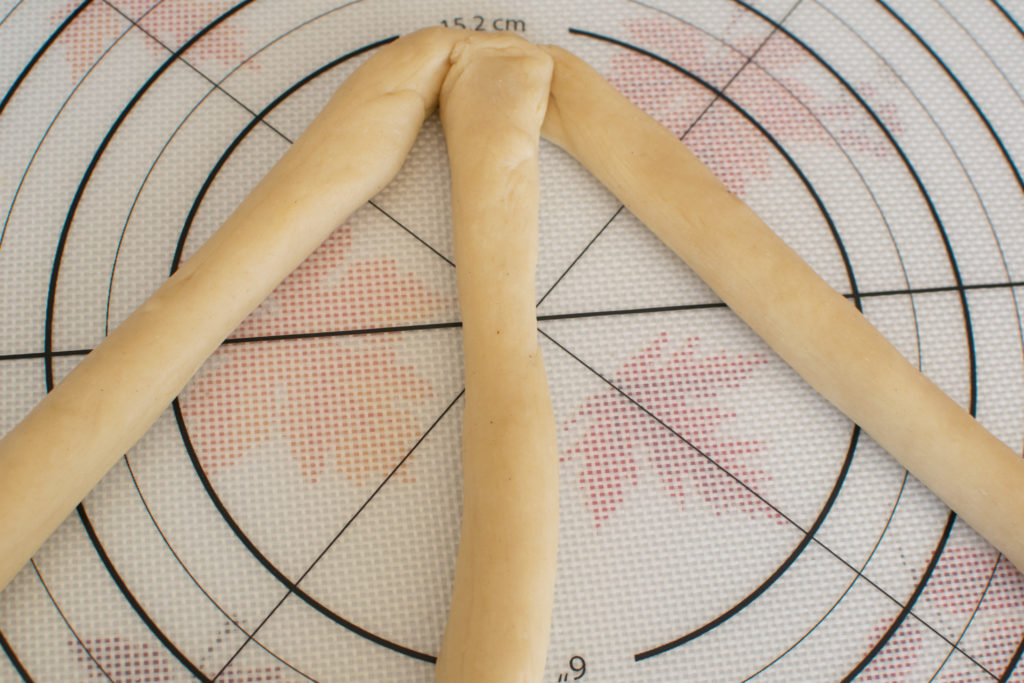
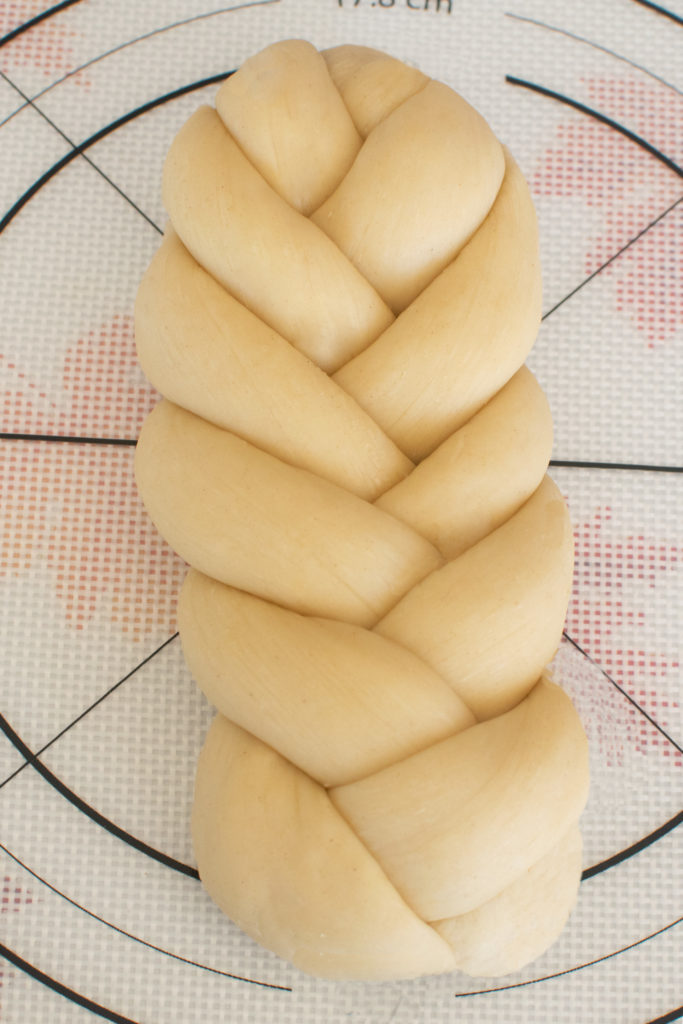
Braiding (3 strands)
- Divide into 6 equal parts (if you want two three-strand challahs). For exact measurements, use a scale to weigh the the parts.
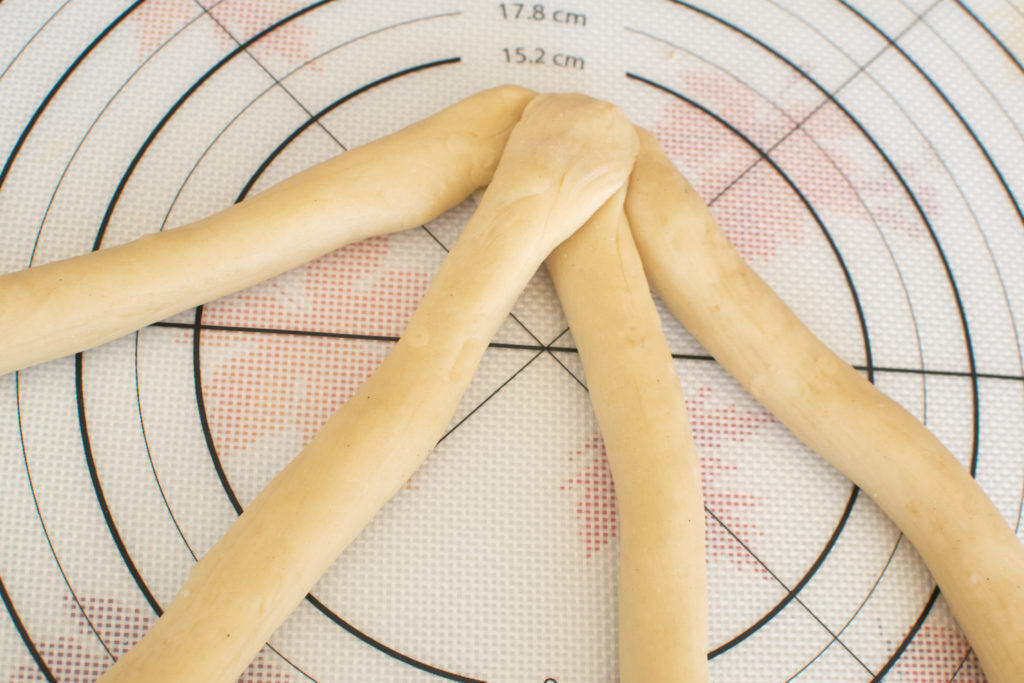
- Roll out the parts into 6 ropes to a diameter of approximately 3/4 - 1 inch and of equal length (the ends should be a little pointed so that they can be pinched easily at the ends).
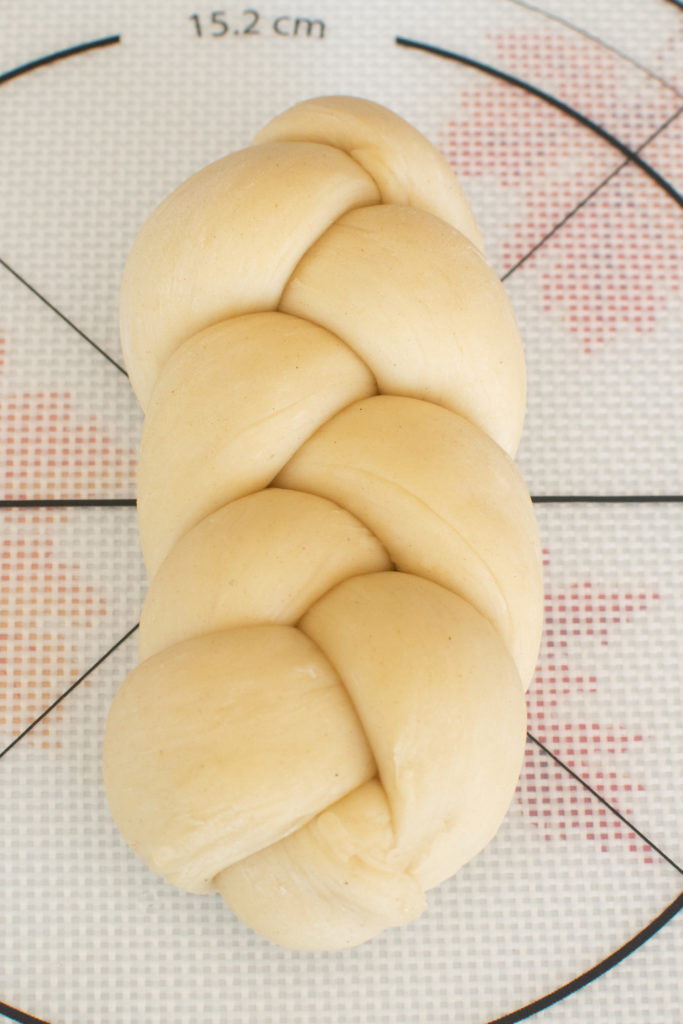
- Pinch the ends of three of the ropes together and braid. Then pinch the other ends together to close.
- Tuck the pinched ends underneath the challah.
- Place the challah on a cookie sheet that has been lightly coated with oil or spray (I use baking sheets).
- Repeat steps 9 - 11 for the other three ropes.
Baking
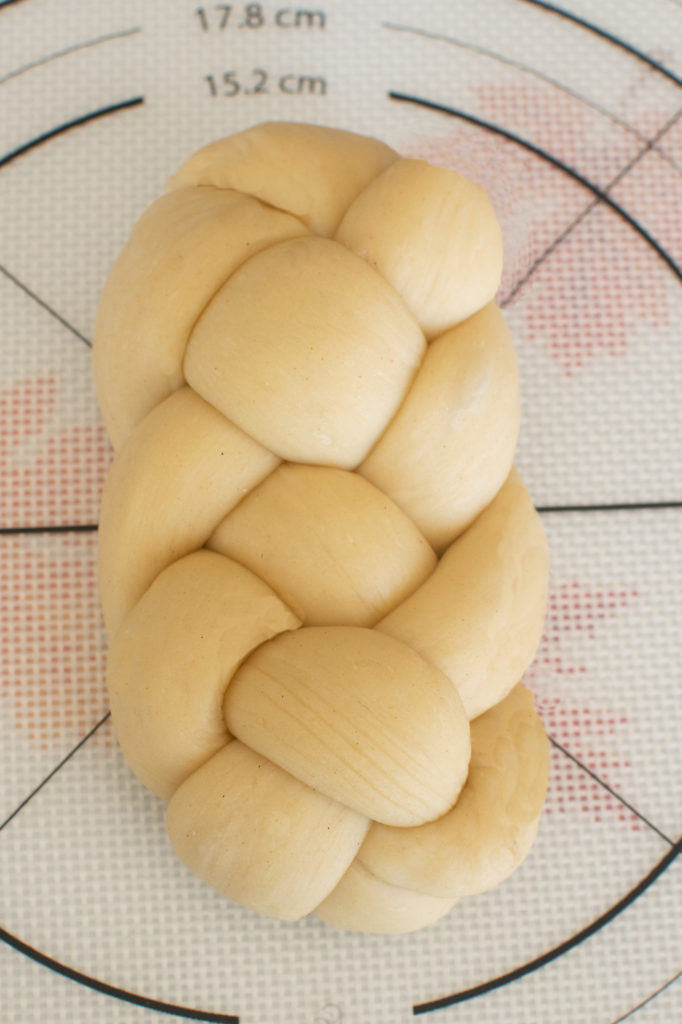
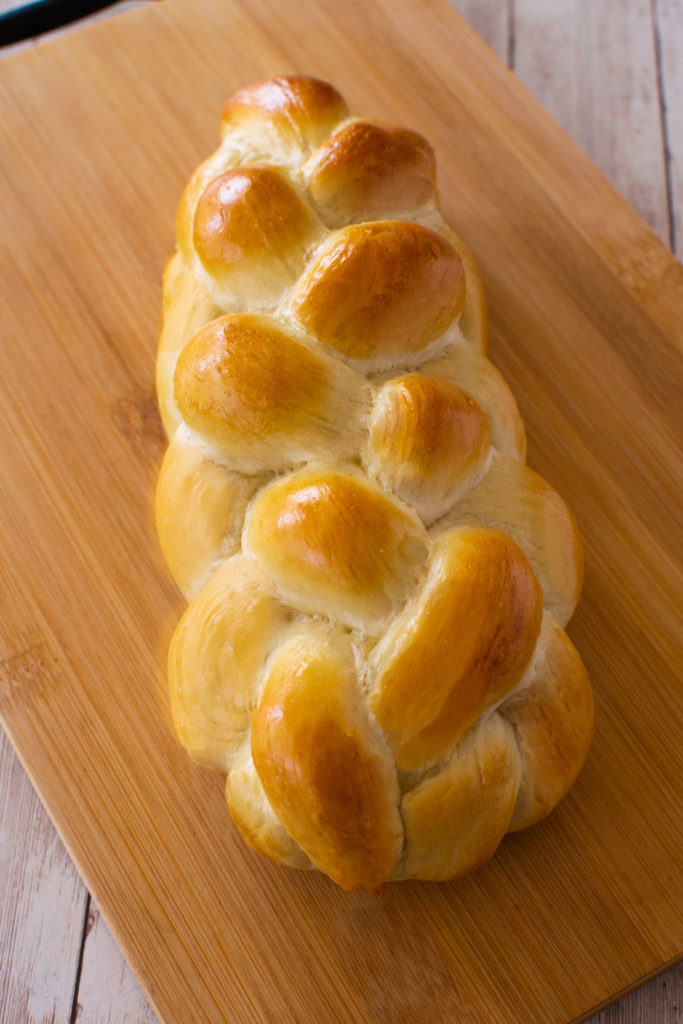
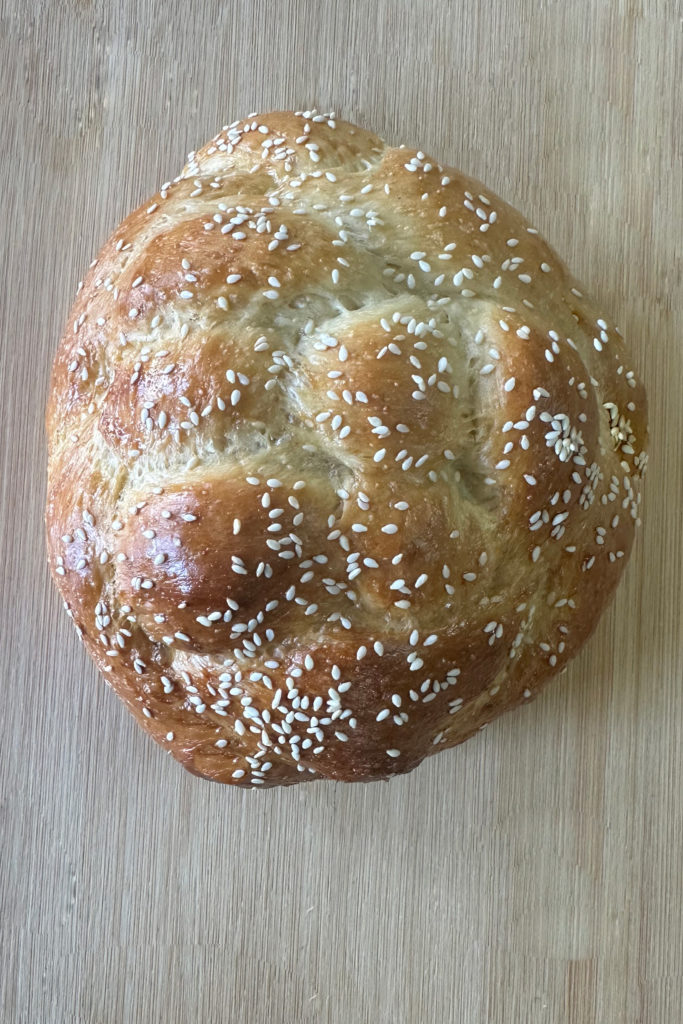
- Beat remaining egg and brush over challahs.
- Add topping(s), if desired.
- Let the challahs sit to rise until they have approximately doubled in size (it doesn't have to be exact, but do not let them rise too much as they may fall when baking).
- Place in oven on a middle shelf that has been pre-heated to 350°F.
- Bake for approximately 30 minutes or until they browned somewhat (at least a light golden brown). If you need to, swivel the cookie sheet around after approximately 15 minutes for more even baking.
- Remove from oven and let cool.
Notes
* You can substitute honey, but it's not a 1 to 1, so make sure to look up how to do this.
** If you are not certain your yeast is active, proof first by mixing a little warm water with a couple of tablespoons of the sugar and the yeast. Let it sit for around 10 minutes for it to bubble. Then, pour it in to the mixing bowl and mix with the rest of the ingredents before you add the remainder of the water.
Nutrition Information:
Yield:
12Serving Size:
1Amount Per Serving: Calories: 157Total Fat: 12gSaturated Fat: 1gTrans Fat: 0gUnsaturated Fat: 10gCholesterol: 47mgSodium: 551mgCarbohydrates: 10gFiber: 1gSugar: 8gProtein: 3g
Joanne Given
Wednesday 15th of May 2024
Can seltzer be used in place of some of the water?
Lori
Wednesday 15th of May 2024
That is a great question! I've never tried seltzer instead of water, just regular tap or filtered. I know that some people use seltzer for extra fluff, but that is not needed here, because of the yeast. If you try it, I'd love to hear if it had any effect. Thanks!